Pottery Without a Wheel: How Handbuilding Became a Creative Hobby for Adults
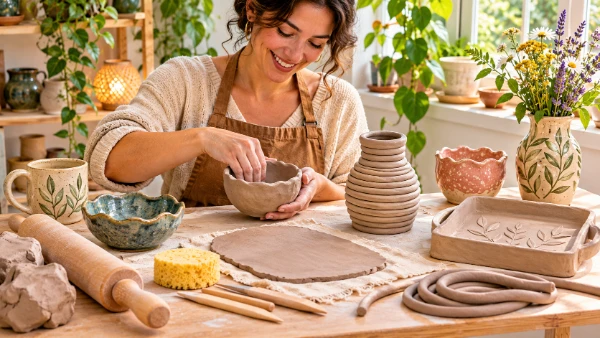
Making pottery no longer means learning to operate a spinning wheel or investing in expensive equipment. Handbuilding has become an accessible creative pastime for adults who want to work with their hands, make useful objects and spend their free time away from screens. Using three traditional techniques — pinching, coiling and slab building — it is possible to shape bowls, decorative dishes, vases and sculptures on an ordinary table. Some projects require only air-dry clay and basic household tools, while others can be finished in a pottery studio with a professional kiln. The appeal lies partly in this flexibility: beginners can experiment at home without a major investment, develop their skills gradually and decide whether they want to pursue ceramics more seriously.
Why Handbuilding Pottery Appeals to Adults
Handbuilding is one of the oldest ways of making pottery, practised long before the invention of the potter’s wheel. Instead of relying on rotation to produce symmetrical vessels, makers construct objects directly with their fingers, palms and simple implements. This gives them considerable freedom over shape, size and surface decoration. A bowl can have gently uneven edges, a vase can feature an asymmetrical silhouette, and a small sculpture can retain the marks left by its creator’s hands. Such characteristics are not necessarily imperfections. They are often intentional details that distinguish handmade ceramics from mass-produced objects.
For adults looking for a creative activity, the relatively low entry requirements are particularly attractive. Painting, woodworking and other crafts may involve specialist materials or dedicated working areas, whereas a basic handbuilding session can take place at a kitchen table covered with a washable mat. A modest starter collection might contain clay, a rolling pin, a sponge, a wooden modelling tool and a small container of water. Most beginners can make their first decorative object during a single session, although drying, finishing and possible firing will take considerably longer. The process is approachable without previous artistic training, and practical skills develop through repetition rather than complicated preparation.
Another reason for the interest in pottery is the nature of the activity itself. Shaping clay involves repeated, deliberate movements that encourage attention to pressure, texture and proportion. Many people find this absorbing after a working day spent using computers, although it would be misleading to treat pottery as a guaranteed remedy for stress. Its value as a leisure activity comes from having a tangible project with no requirement to achieve a particular standard. Someone might spend an evening experimenting with unusual shapes, while another person may prefer the practical challenge of producing a matching set of small dishes. Both approaches offer opportunities to learn through making.
Choosing Between Air-Dry Clay and Kiln-Fired Ceramics
The most important decision for a beginner concerns the material. Air-dry clay hardens as moisture evaporates and normally requires no specialist heating equipment. Products sold under this name differ in composition, with some containing mineral fillers and binders that help the material retain its shape. They are suitable for decorative bowls, ornaments, wall hangings and small sculptures. Depending on the product, a piece may feel dry after approximately 24 hours but need several days to harden completely. Thickness, room temperature and humidity influence the drying period, so the manufacturer’s instructions should always take priority over general estimates.
Traditional pottery clay behaves differently because drying is only an intermediate stage. Earthenware, stoneware and porcelain must undergo firing in a kiln to become ceramic. Firing changes the material permanently, producing a much stronger object than an unfired clay model. The appropriate temperature depends on the clay body and intended finish. Earthenware is generally fired at lower temperatures than stoneware, while some stoneware and porcelain bodies require temperatures above 1,200°C. Many studios use an initial biscuit firing followed by a separate glaze firing. A domestic kitchen oven cannot replace a pottery kiln because it does not reach the temperatures necessary for these transformations.
The intended use of the finished object should determine which material to buy. Air-dry clay is generally unsuitable for food contact, prolonged exposure to water or direct heat, even when covered with ordinary craft varnish. It works well for a jewellery tray or a decorative vessel holding dried flowers, but not for a drinking mug or a bowl used to serve meals. Functional tableware requires a suitable ceramic body, correct firing and a food-contact-appropriate finish. Even with kiln-fired pottery, not every decorative glaze is appropriate for dishes. Beginners should establish these distinctions before starting rather than discovering after several hours of work that their chosen material cannot safely serve its intended purpose.
Three Handbuilding Techniques That Beginners Can Learn
Pinching, coiling and slab building form the foundation of handbuilt pottery. Each method changes how the clay is handled and what kinds of objects can be constructed. Pinching relies on pressure from the fingers, coiling uses long strands arranged in layers, and slab building starts with flattened sheets. None requires a wheel, and all three can be practised with either suitable air-dry material or conventional pottery clay. Their differences become particularly noticeable when making larger objects, where the strength of joints and consistency of wall thickness begin to matter.
Before shaping anything, the clay should be workable without feeling excessively wet or crumbly. Pottery clay that has become too firm may crack when bent, while overly soft material can collapse under its own weight. A clean, slightly absorbent work surface helps prevent sticking, and unused portions should remain covered to retain moisture. Beginners often add too much water in an attempt to make shaping easier. In practice, a small amount applied with a fingertip or damp sponge is usually sufficient. The aim is to maintain a consistent texture throughout the project rather than repeatedly soaking the material.
There is no need to master all three approaches immediately. A sensible progression begins with a small pinched vessel, continues with a coiled container and finishes with a slab-built box or tray. These projects introduce different challenges without demanding expensive tools. Beginners also learn to recognise when clay needs to rest before further shaping. Slightly firmer material can support clean edges and attached details more effectively than very soft clay. Understanding this gradual change in consistency is one of the most useful skills in pottery, regardless of the technique being practised.
Pinching, Coiling and Slab Building in Practice
Pinching is generally the easiest starting point because the entire object develops from one piece of clay. Begin with a smooth ball approximately the size of a small orange, press a thumb into the centre and leave enough material beneath the indentation to form a stable base. Slowly rotate the ball while pressing the walls between the thumb and fingers, working upwards and outwards. Try to maintain a reasonably even thickness, particularly where the base meets the sides. Uneven pressure can leave weak sections that crack during drying. A small bowl, salt dish or miniature planter cover provides a manageable first project. Once the basic shape is complete, the rim can be gently smoothed or deliberately left irregular for a more organic appearance.
Coiling is especially useful for taller vessels and rounded sculptural forms. Roll several pieces of clay into long ropes of similar thickness, then arrange the first coil into a circle or spiral to establish the base. Additional coils are placed one above another, gradually increasing the height of the walls. With conventional pottery clay, joining surfaces are commonly scratched and coated with clay slip, a mixture of clay and water, before being pressed together. The joins should also be compressed and blended to improve their strength. Air-dry products may require different joining methods, so follow their instructions. The coils can remain visible as a decorative feature or be smoothed into a continuous surface. Gentle inward or outward adjustments to successive layers allow the maker to create narrower necks, wider bodies and curved profiles.
Slab building offers a different approach, particularly for angular shapes and objects with broad, flat surfaces. Roll the clay between two guides of equal height to produce a sheet with consistent thickness, often around 5–8 mm for small beginner projects, depending on the material. Templates cut from paper or cardboard help establish matching sides for a box, while a shallow dish can be formed by draping a slab over a suitable mould. For upright constructions, allowing pottery clay to become slightly firmer before assembly helps prevent distortion. Joined edges need careful preparation and compression, with additional support where necessary. Slab work is well suited to trays, wall decorations, small houses and geometric vessels, although large flat pieces require particularly careful drying to reduce warping.
Making Pottery at Home and Attending Creative Workshops
A home pottery area does not need to occupy an entire room. A stable table, washable covering and access to water are sufficient for most small handbuilding projects. Useful inexpensive equipment includes a rolling pin, wooden spatula, blunt knife, sponge, modelling sticks and a container for storing unfinished work. A piece of cotton fabric or canvas can prevent some materials from sticking to the worktop, although textured fabric may leave impressions on the underside. Clay should be stored according to its packaging instructions, and conventional pottery clay needs protection from drying out between sessions. A covered box or carefully wrapped plastic sheet can help preserve a project that cannot be completed in one sitting.
Good housekeeping matters, especially when working with conventional ceramic clay. Dried clay dust may contain respirable crystalline silica, so it should not be brushed into the air or removed with an ordinary dry duster. Wiping surfaces with a damp sponge and cleaning tools before residues harden are more appropriate habits. Clay waste should not be washed directly into household drains, where it can settle and contribute to blockages. Instead, collect contaminated water in a bucket, allow heavier particles to settle and dispose of the remaining material according to local arrangements. These precautions are straightforward and make a domestic craft area easier to maintain over repeated sessions.
Choosing a manageable first project helps make the experience more enjoyable. A small decorative dish can be shaped in one evening, while a detailed vase may require several sessions and additional drying time. It is useful to keep early pieces relatively small, avoid unnecessarily thick solid sections and resist handling them constantly as they become firm. Projects should dry evenly, away from strong direct heat or sudden temperature changes. If conventional pottery is being made, the object must reach the appropriate dry condition before firing. Rushing this stage risks cracks, distortion or damage in the kiln. A successful first attempt is often a simple, carefully finished object rather than an ambitious construction that exceeds the maker’s current experience.
How Workshops Help Turn a Casual Interest into a Lasting Hobby
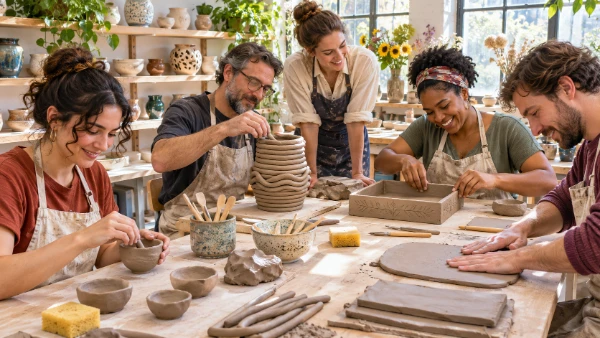
Pottery workshops offer an alternative for adults who would rather try the activity before buying supplies. Introductory handbuilding classes commonly cover clay preparation, the three main construction methods and basic surface decoration. Participants may produce a small bowl, mug-shaped decorative vessel or sculptural object during a guided session. An instructor can demonstrate how much pressure to apply, explain why walls collapse and help correct weak joins before the clay dries. This immediate feedback can be difficult to obtain from written instructions alone. Group sessions also provide a social element, making them appealing to friends, couples or individuals who want a regular activity outside work.
Workshop arrangements vary, so checking the details before booking is worthwhile. Some classes include materials, tools, glazing and kiln firing in the advertised price, while others charge separately for finishing or collecting completed pieces. Where firing is involved, finished ceramics are rarely available to take home immediately. They usually need to dry, undergo one or more firings and cool before collection. This may take several weeks depending on the studio’s schedule. Participants should also ask whether the workshop produces decorative objects or functional tableware, particularly if they intend to use a finished bowl or cup for food and drink.
People who enjoy their first session can continue through short courses, open studio memberships or occasional workshops without purchasing a kiln. Some ceramics studios accept work made elsewhere for firing, although they may require information about the clay body and its recommended temperature before agreeing to handle it. For those who prefer working at home, air-dry clay remains a practical option for decorative projects and design experiments. Over time, the hobby can develop towards more demanding forms, surface textures and glazing techniques, or remain a simple way to make personal objects during quiet evenings. Handbuilding accommodates both approaches: the essential skills are learned through repeated contact with the material, and the investment in equipment can remain proportionate to the maker’s interests.